
How to Prevent Excessive Use of Wifi Connections by Windows Update
Glasswire is a mostly-free bandwidth monitor for Windows PCs. It probably does a few other things too. One of the nasty things Windows will do it start updating the operating system just when you are watching a live show online with very limited data bundles. All of a sudden, Windows decides out of it's great WISDOM, that when you are almost out of bundles in the middle of this crucial show is the best time to start downloading massive updates.Bad thoughts flash through your mind but you manage to get hold of yourself. Who do you blame anyway? Some anonymous software engineer in Redmond, WA??
The thing is, you need to sort out this mess. There is an easy way of preventing Windows from misusing your bundles via a Wifi link: Set the Wifi link to be metered. How?
The sequence is illustrated below. It goes like this:
- Press the Windows key to get the Start menu (assuming Windows 10)
- Click the gear icon to get the Settings menu

- Click the Network icon to get network settings
- Click the Wifi menu of the left side panel and Select "Manage Known Networks"
- Click of the offensive Wifi network then Select Properties and
- Turn on the Metered Connection switch for that network.
1. Windows Key

2. Start Menu
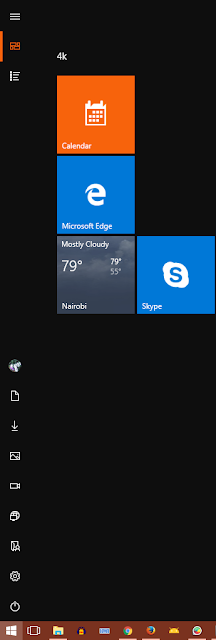
Gear Icon

3. Control Panel

4. Manage Known Networks

5. Wifi Network Properties

6. Metered Connection Switch

But you still need Windows updates else the ramsonware guys will get you right?
No problem.
Twice a month or so, turn the metered connection to off and make sure you have plenty of bundles then go to the Control Panel and select "Updates & Security" then "Download"

Download Button

Now you are relatively safe from the fat guy in the basement cooking up ransomware and other warez.
The Messiah is coming. Make sure you prepare.
Comments
Post a Comment