
Once the events, streams and cameras are set up, you switch to the Live Control Room from where you can preview the event, monitor the live stream through video and statistics (analytics) and turn off streaming. The Control Room interface includes an indication of stream health - whether the server is receiving data from you encoder and at what speed.
The steps involved in setting up for multi-camera streaming are as follows:
1. Sign in to a verified Youtube account. Verification requires that you have observed the rules for Youtube accounts and have not infringed on copyright in the last 90 days.

2. Once you are logged in, locate the Youtube Creator Studio.


3. In the Creator Studio show below, you will find several menu options including Dashboard, Video Manager, and Live Streaming.
The Dashboard will be very useful when you need to edit or delete the recorded live streamed video. Live streamed videos are automatically recorded by Youtube.
 |
| Creator Studio Interface |
4. The Live Streaming option has the Stream Now option which was described in the article on simple live streaming. In this article, we want to explore Events.
The right hand panel in the Events menu allows you to edit an delete and event. It also allows you to enter the Live Control Room and manage a particular event. Your events are listed here. You can use the settings of one event to set up a new event to save time. This feature is especially useful when events are similar to each other. For example, a church service that happens each Sunday at the same place and same time.
 |
| Events Sub-Menu |
5. The next step involves creating a new event. The illustration below shows Button 1 that can be used for this purpose. Button 2 is used to enter the Live Control Room while Button 3 is used to edit events.
 |
| Functions in the Event Sub-Menu |
6. This illustration shows another way to create a new event.
 |
| Alternative Way to Create an Event |
7. To create an event, supply the information shown in the illustration below that includes:
- Name of the event
- Event starting and ending times and dates. Dates need to be logical - end date should come is after start date, start date is "now" or in the future, not in the past.
- The Time Zone of the event location.
 |
| Creating an Event |
 |
| "Create Event" Button |
The event can be public (open to all), private (restricted access) or unlisted (invisible to others)
 |
| Privacy Settings |
9. The following screenshots show the Advanced Settings sections of events configuration. Most of these settings are self-explanatory.


10. We are now ready for the Ingestion Settings that include (i) adding cameras and (ii) setting up streams. The Main Camera can not be renamed. Ingestion refers to the act of feeding the streaming server with video and audio data in the right format. The Main Camera is the first to be configured. Additional cameras can be assigned customized names.
 |
| Ingestion Settings |
11. A stream key can be either selected from keys that you created and saved in the past or created afresh. It is safer to create a new stream as shown below.Three main settings are required:
- The stream name
- Stream description
- Bit rate
 |
| New Stream Menu |
 |
| Creating a New Stream |
 |
| Add caption |
12. You now have the stream name/key and the URL as shown below. The Stream Name (also called the stream key) and Primary Server URL are combined to create the Larix Broadcaster URL as follows:
rtmp://a.rtmp.youtube.com:1935/live2/sgkw-jb1j-6bjh-8xs1
- The number 1935 is the port number. For Google's live streaming servers, it is currently 1935.
- The blue text is the Stream name.
- If there is any error in the URL, the encoder will not connect to the streaming server.
In some encoders, these parameters may need to be entered separately.
 |
| Encoder Parameters |
13. Up to six additional cameras may be set up. However, ensure each has sufficient bandwidth on your Internet connection. Stream names should match the camera to which they are assigned. Reusable stream names can be used during other events but we found that two cameras that are live at the same time can not share the same stream names. When viewers access the live video on Youtube, camera names are visible and viewer-selectable.

 |
| Adding a Camera |

14. Once the cameras and associated streams are ready, set up the encoders. In this example, we will use the Android app called Larix Broadcaster and the encoder. See this article on how to configure the Larix Broadcaster. Once configured, start streaming. It's important to get clean shots right from the beginning because Youtube records the stream.This stream may be viewed by a large number of people. The quality of the stream may influence your public image. Maintain high standards in your videography.
Encoders are software or hardware that feed the streaming server with video and audio in the correct format. Typically, they acquire the video and audio from a camera and, if necessary, digitize and convert to an appropriate format before sending to the streaming server using the server-dependent protocol. In this case the protocol is RTMP which is the
real-time messaging protocol.
15. Once the encoder is streaming, it's time to visit the Live Control Room shown below. Press Preview to see the stream before the event becomes visible to your viewers. The Control Room interface allows you to see both the preview stream and the public stream. The viewers will begin seeing the stream at the time you set as the start time for the event in step 7. The Control Room provides:
- A view of stream information including stream heath
- Stream management interface
- Stream analytics (information on viewership)
- Live chat with viewers (if you have enabled it)
- Stream termination buton
 |
| Live Control Room |
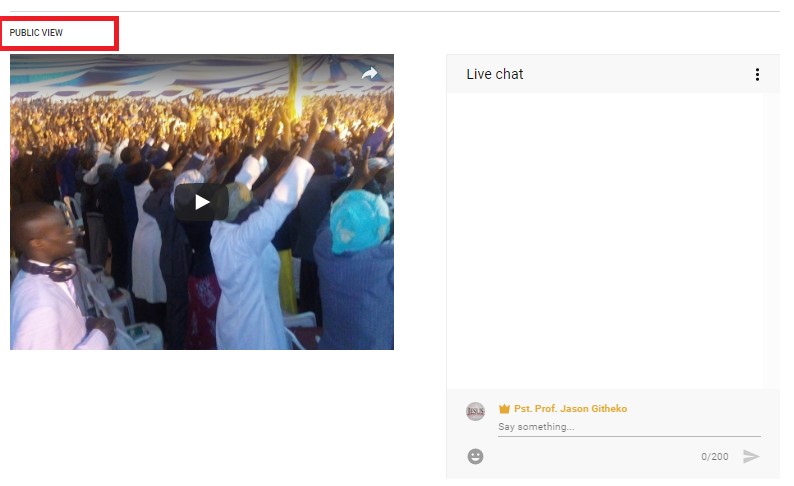 |
| Public View and Live Chat |
 |
| Analytics |
 |
| Events View |
 |
| Events Actions |
In Summary
- Create an event
- Define streams within the event. Typically each stream is associated with a camera and is identified by a stream name ( or key) in addition to the server URL. These two parameters are used to configure the encoder.
- Once the encoder is ready and running, visit the Live Control Room to manage the event.
Hardware and Software
There are many hardware and software options for live video streaming. The one described here relies on a smartphone, Larix Broadcaster and Youtube Live. It is illustrated below:

Typically, the smartphone will connect to a wireless router via Wifi then on to the Internet via a 4G connection. When using a wireless router, the Internet speeds are determined by this router and not by the 3G or 4G rating of the phone. However, the phone can connect to Youtube directly via a 3G or 4G link rather than through a router. 3G networks can be used but expect lower video quality since you are unlikely to achieve high definition (HD) video streams through a 3G link. Larix offers a wide range of video resolutions but follow Youtube recommendations. By testing different resolutions, you can tell what will work well in your environment. However, anything below 360p is not likely to be acceptable to viewers.
The above Youtube configuration is the more tedious while Larix configuration is relatively trivial.
See this article on how to configure Larix and this article on how to configure simple live streaming on Youtube.
Best wishes and happy streaming. The Messiah is coming, prepare.
Kindly note that this entire series on streaming is solely designed to help us prepare for the coming of the Messiah.
Very nice article. I enjoyed reading your post. very nice share. I want to twit this to my followers. Thanks !. https://www.webcasting.com.au/services-2/multi-camera-broadcasting/
ReplyDeleteThanks. I am glad it was useful. I've seen a few typos here and there but I doubt I will get time to comb through and clean it up.
DeleteNice blog and easy understandable. Thanks for sharing
ReplyDeleteTry Peoplelink Live Webcasting Software - Impactful & Real time Web audience engagement with PeopleLink Central Recording & Streaming
https://www.peoplelinkvc.com/live-webcasting-streaming-software